Mac OS X: Quick Look-installing the plug-in
After you have downloaded a Quick Look plug-in, you will receive this mostly in a ZIP file. Unzip this to the XXX.to get the qlgenerator file.
- You can install a Quick-Look-Plugin in two different Ways: either for all users or only for yourself.
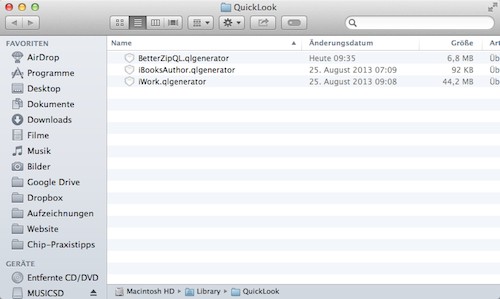
- If you want to install it only for yourself, you need to move the. qlgenerator file in the folder "~/Library/QuickLook". In this case, the "~" stands for your personal user folder.
- If the plug-in should be suitable for all users, you need to move it to the folder "/Library/QuickLook". To do this, administrator rights are necessary.
- Both the Library folder is hidden since OS X 10.7. To access your personal Library folder, open a Finder window. Click with pressed alt-button in the menu bar, click on "Go" and select "Library". Then, navigate to the folder "QuickLook" or create a new one. Now you have to copy the. qlgenerator file.
- The system-wide Library folder, you can only with a Terminal command ("chflags nohidden ~/Library") or with programs such as "HideSwitch" to make visible. Details of these can you find in this practical tip. Then copy the. qlgenerator file in the folder called "QuickLook".
Quick-Look-Plugin install
Read also-how are they system files in the Finder can can.