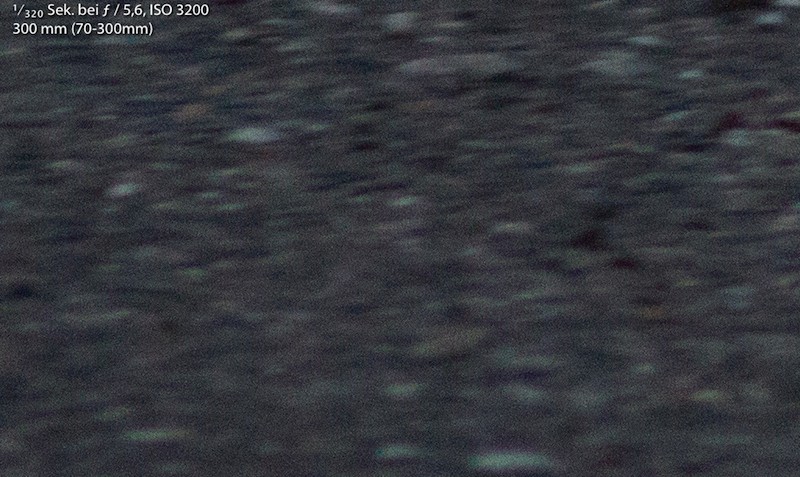
Image noise due to high ISO value
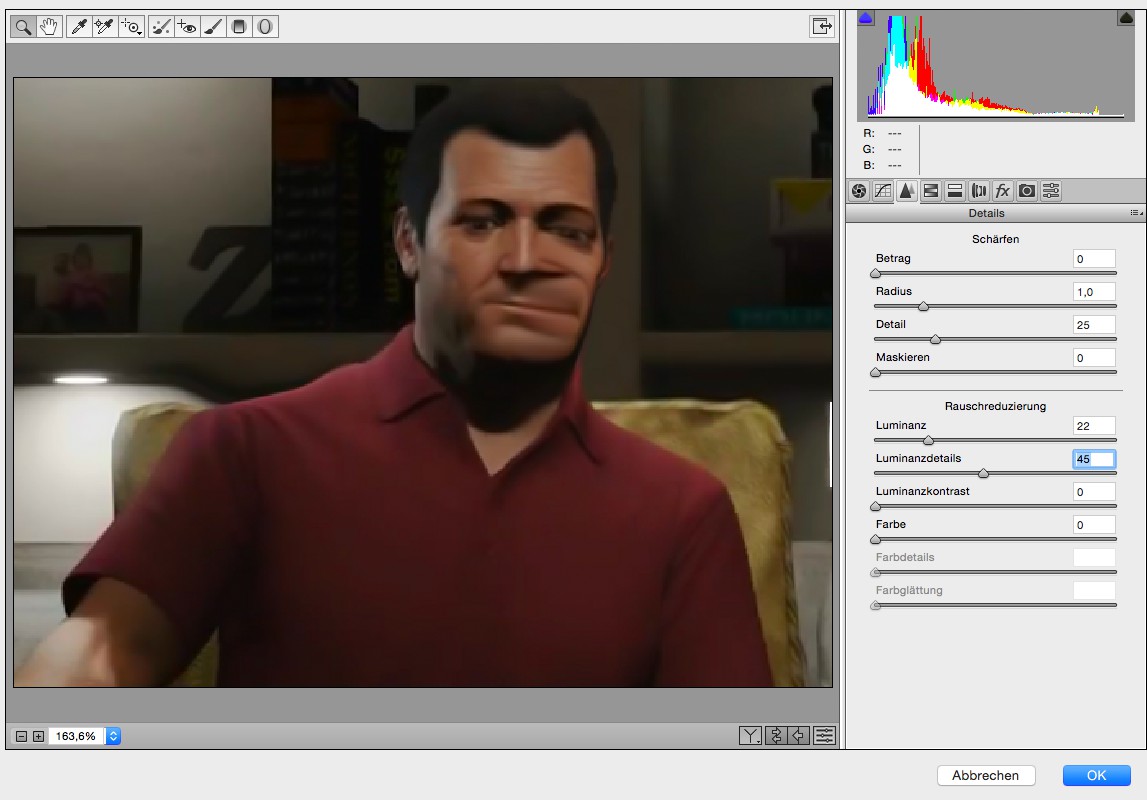
Image noise with Photoshop remove
In order to keep the loss of quality when Removing the image noise is low, you should decrease the size of the image to the required size.
- Paste the image in Photoshop and make a copy of the background layer.
- Before image correction, you should see your image, if possible, zoom out. By the down count of the size of a part of the image noise is also removed automatically. As you images in Photoshop, reduce the size, we will show you here.
- After the Shrink of the image click in the menu bar, click "Filter" and the "Camera Raw Filter".
- Now click on the right side on the tab "Details", represented by two different-sized triangles.
- Under "noise reduction" you can now remove the "luminance"Slider image noise.
- With the other controls, you set a range to not be recognized in the noise reduction still. If you set, for example, the Controller "Luminance detail" later, tried Photoshop to protect the Details in the image. In these areas the image is noise, but not far.
- In General, you should handle the controls very gently and only small values. Usually a slight Lift of the luminance control ranges.
- After you are noise satisfied, confirm in the bottom right with "OK".
In Photoshop, image remove noise
In a further practical tip we will show you the best tips to your images with Photoshop to improve.


