1. Picture in Word to insert
Before you can align the image next to the Text, you first need to insert the image into your Word document.
- To do this, open your document and select the Text an approximate location in the image is to be inserted.
- Then click the "Insert" tab and then "image".
- Now you can choose your image. Press OK to confirm.
2. Aligning an image next to the Text
After you have inserted your image, you can now set the line break so that Ih image next to the Text:
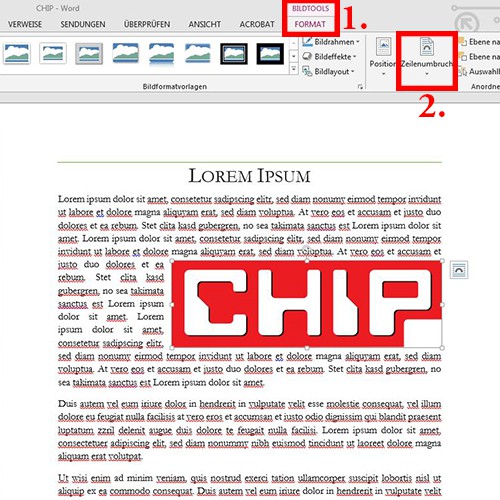
- To do this, first click the corresponding image. Now the word "picture tools" will appear on the tab "Format". Select this tab.
- There you will find the sub-item "line break".
- Click on it and select "square" so that the Text flows along the image edge.
- Do you have a PNG file inserted, you can also "Suitable" to select, so that the Text on the actual edges of the image adjusts. Transparent areas can be recognized by us hidden.
Word: image next to Text align
You now have the image inserted, you can also give a caption to enter.


