Step 1: Old photo enable display in Windows 10
Note: in the Meantime, all of the functions of the old photo display are no longer available. View you can view your pictures as usual, the direct Print via the photo viewer, however, possible.
- Simultaneously press the keys [Windows] and [R], so that the command "Run" will open.
- Here you can enter the command "regedit" and confirm with "OK". Then the registry Editor will open.
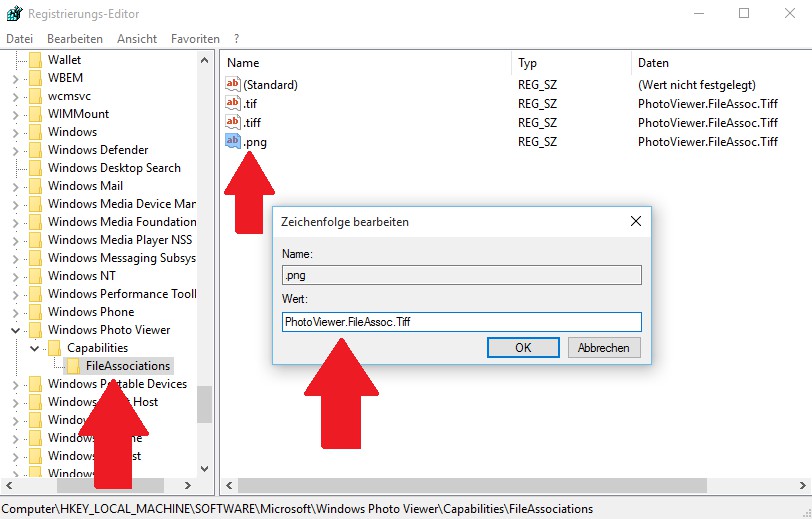
- Navigate on the left to the path "HKEY_LOCAL_MACHINE\SOFTWARE\Microsoft\Windows Photo Viewer\Capabilities\file associations".
- Click with the right mouse button on a free area on the right side and select "New" and the "string".
- Rename the string ".jpg" and open them with a double click.
- Then set as the value "photo viewer.FileAssoc.Tiff" and confirm with "OK".
- The repeat for all other desired image formats like PNG, JPEG, GIF, or BMP. The value always remains the same.
Windows 10: Old photo display
Step 2: Old photo, select the display in Windows 10 as the default
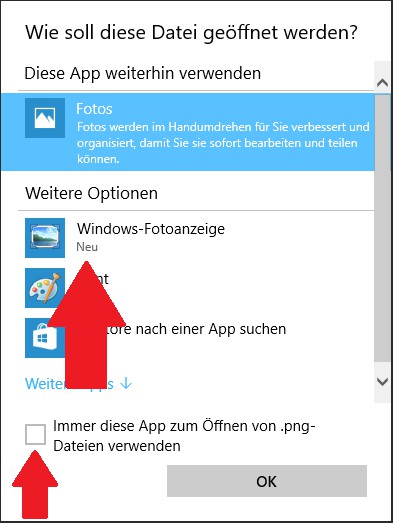
- Close the registry Editor and open any image file.
- Now you have the choice between several display programs. Here, select the "Windows photo viewer".
- Then activate the Option "use Always this App to Open the files use".
- The Dialog does not appear, click with the right mouse button on the image and select "Open with" the "Other App".
- Via the Button "OK" to save your settings. This query you need to perform for each file type such as PNG and JPG unique.
Windows 10: Old photo display
In the new Microsoft System, you can with your images a lot more to do: In the next practical tip we will show you how you image code under Windows 10 login.


