What chipset do you have? So you figure it out
To find out what chip is installed in your PC, you have several options:
- For one, you can open the case and take a look in the Inside of the PC throw. Note: do not Remove for security reasons before the power supply plug.
- There you should find a sticker with the model number of the chipset.
- Alternatively, you can use the free Tool CPU-Z download and install.
- The program will then show you at a glance what chipset you have.
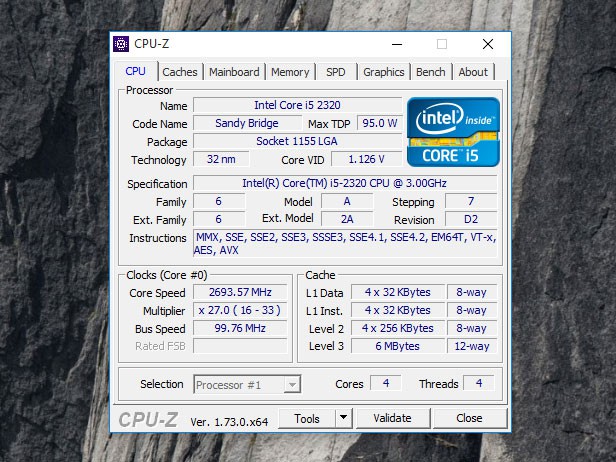
CPU-Z: chipset find out
Chipset driver update – so go ahead
Go to the page of the manufacturer of your chipset and download the appropriate chipset drivers.
- Right click on the file and select "create shortcut".
- Then click again with the right mouse button on the shortcut and select "properties".
- Insert in the target box "-OVERALL" at the end.
- Then start the shortcut as Administrator by right clicking it and "run As Administrator".
- You have to wait until the update is completed successfully.
- Note: While the screen can be black.
Chipset driver update
All the motherboard connections in the Overview you will find in our next practice tip.


