Genymotion: Android and Windows in parallel to use
- The fastest and easiest way does it work on an Emulator such as Genymotion. Allows you to launch Android as a Software and thus parallel to Windows.
- Download the Software and click through the Installation. Then, you have the choice between 20 different Android Smartphones.
- Now you can operate selected Smartphone with the mouse. Also Playing Android Games is a liquid possible. Currently you can choose between Android 5.1 and older versions.
- Note: Genymotion is available free of charge, before you need to however, be a Account from the manufacturer set up. The additional options are for the normal user is not relevant.
Android Emulator for Windows
Android-x86: Windows and Android in parallel
Alternatively, you can install Android as the operating system on your Computer. This is done with the customized Version of Android-x86. To switch between Windows and Android, you must start the Computer for always.
- Download: Download Android x86 download, you will get a ISO file. Burn the file with a Software like CDBurnerXP to a CD or use a blank USB drive and a Tool like ISO to USB.
- Partition: to install Android in parallel with Windows, you need an empty Partition. This must be created in the rule. A size of 3 GB you should use at least. Here you will find a suitable guide.
Android-x86 for the PC
Instructions: Android-x86 in parallel to install Windows
- Insert the CD into the Computer and restart. You have Android-x86 copied to a USB Stick, so you plug this into a free Slot.
- Now you should start instead of Windows, the Installation of Android-x86. This is not the case, change the Boot order.
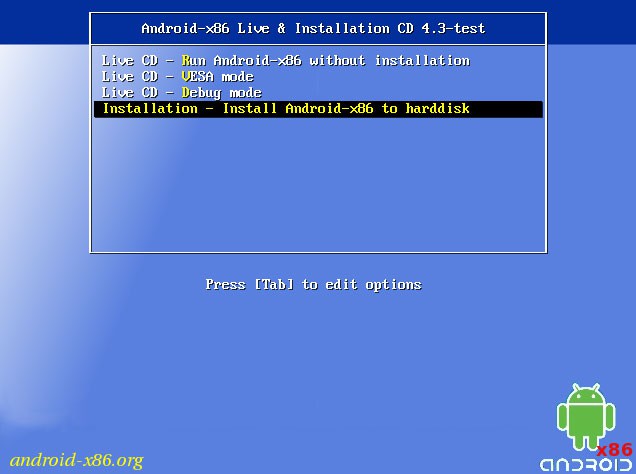
- Was Android-x86 started now, choose below the Option "Installation".
- Here you can select the "Create/Modify partitions" and then "New" and "Primary".
- Enable the Option "Bootable", and select "Write" and then tap "yes".
- Now select the newly created Partition and format it if necessary with the file system "ext3".
- Confirm further requests with "Yes", will Android be installed on x86.
- Afterwards, you can launch Android and set up. Windows and Android are now installed in parallel.
Windows PC: Android x86 install
In the next practical tip we show you how to Android-Apps in Chrome to use.


