Right 4D rendering in Cinema: material, lighting and shadows
In order to get a usable image or Video, it is important that you set the material and the lighting in your scene correctly.
- Many material already exist as a Preset, you must later set the color. You can find this by selecting it in the Material window, click "Generate" and then "Shader" one of the many Presets.
- During the construction of your 3D scene this is is already lit by a standard light (otherwise your scene would be completely black). As soon as you add a light source to your surroundings, eliminates the standard lighting. Choosing the right light sources and the calibration of these is an important part when rendering.
- With Spotlights, you can display direct light sources such as directional light of a headlamp. With this light, you can also create first-class shade. Click in the Overview on your light and then click on the tab "shadow". Here you can meet some of the settings, which can greatly affect the speed of the rendering process. Soft shadows are more realistic, but require significantly more time to render.
- The incidence of sunlight through a window or a General lighting, you can use area light sources. However, you can choose for outdoor scenes is also very good a environment from the Presets, which includes a sun as a light source.
- Finally, you should create a camera that defines the area to be rendered.

Cinema 4D: the shadow
Right 4D: render settings for still image, modelling and animation (Videos)rendering in Cinema
In Cinema 4D you basically have the choice of whether a Video or a still image to create.
- A Video to render, you must previously created a new Animation in. You should consider beforehand what settings to have your Video later, so that the Animation runs later, too fast or too slow.
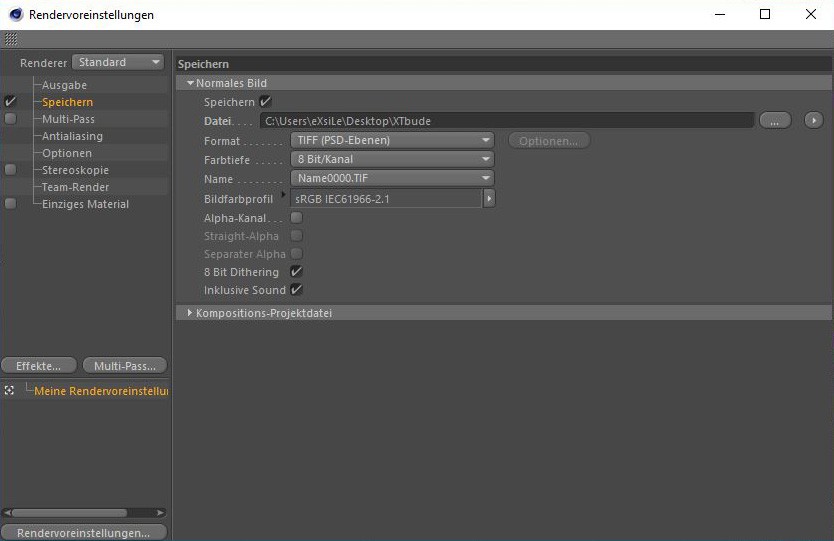
- The render settings you will find with a click on the video on the fold icon with the Gear in the toolbar. Thereafter, a separate window will open with all sorts of setting options.
- For a Rendering of the settings under the tab "output" are the most important. Here you can specify the output size and the resolution. Under "Save" you can select the output path, the Format of the image and the color depth, as well as the image color profile.
- When you render an Animation, you can under "output" click on the triangle icon, select Render Presets. You can enter the video data manually. Select "Save" now, in any case, the Format and the output area.
- You start the render process with a click on the middle Render icon. The render process can take, depending on the computer, complexity and length of the scene a few seconds up to several hours.

Cinema 4D: render settings
As you in Cinema 4D easy 3D Text, we will show you in this practical tip.


