DaVinci Resolve: Color Grading
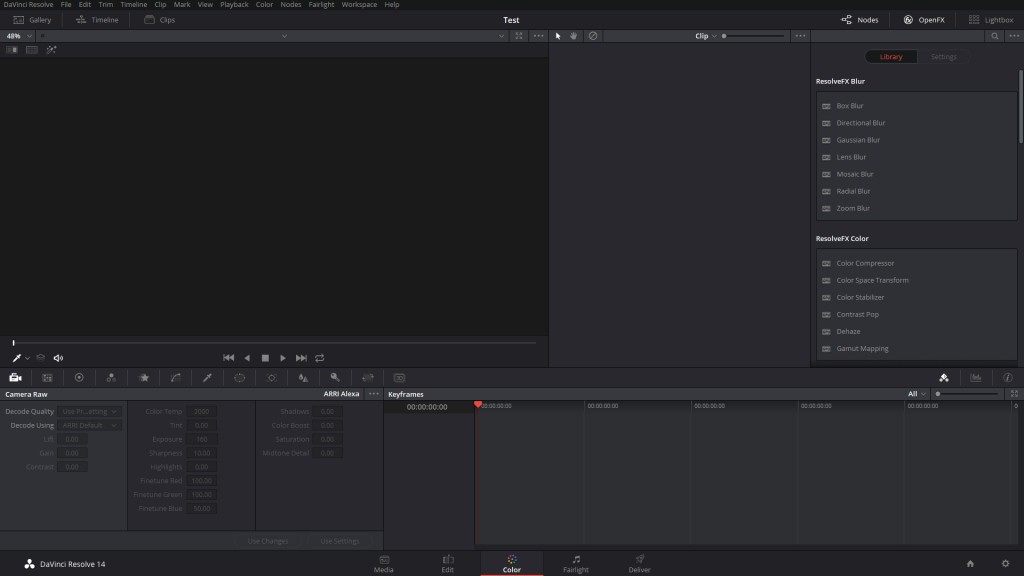
The section for Color Grading in DaVinci Resolve on, by clicking on the color circle icon at the bottom in the middle of it.
- On the left you will find the section "Camera RAW", you can, among other things, for example, the sharpness change.
- To the right of the function "Color Match is can edit", with the hue of the video.
- In the case of the "Color Wheels" you can edit the colors of the Videos. Here also the contrast, for example, change.
- Similar to the "RGB Mixer works can have" a certain shade "stand out".
- In the case of "Motion Effects" you can apply different effects, such as, for example, a motion blur on the Video.
- On the right you can find the section "Curves," where you have a color curve to edit the Videos.
- In the section "qualifiers" allows you to filter certain colors out. For example, in the case of green screens virtually.
- In the case of "Window" you can cut a certain part of the video out. Here too, objects can, for example, to filter out.
- In addition, you can find the function "Tracker" that allows you to track a specific area in the Video and can post-process. With this feature, the faces of actors, for example, lighten.
- With the function "Blur" allows you to add blur to your Video.
- Also, the section "Key" is for the selection of colors and areas of the screen very convenient.
- With the function of "Sizing" you can rotate your Video, or scale.
- Finally, you can use the section "3D" for 3D Videos.
- So that the individual functions do not interfere with each other, add so-called "Nodes". Then you can use the functions independently of each other.

DaVinci Resolve: Color Grading
In the next practical tip we show you how to green screen in DaVinci Resolve, remove can.


