Audacity: how to record Audio and cutting - introduction in the Basics
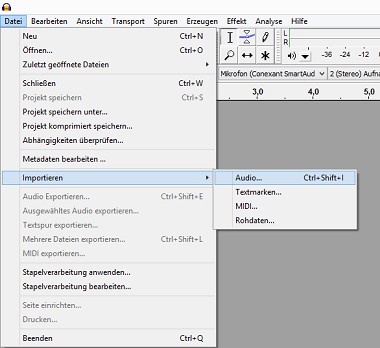
- Insert file: For a good quality of the Audio file should be in WAV. But also a high quality MP3 file, you can use. Unusual formats should you previously convert. Then, move the file by Drag&Drop it into Audacity, or add Import "file">"".
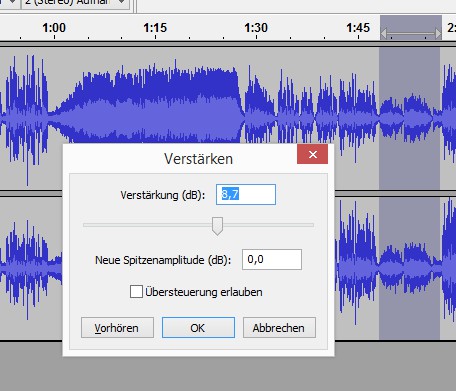
- First sound volume adjustment: Before you make the cut, you should adjust the volume of the coarse - over "effects > Amplify". Here is to automatically calculate how much the volume of the entire track can be raised to arrive at the loudest point to 0 dB. The more uniform the recording is, the better.
- Cut: The [empty] button has the functions "Play" and "Stop". [P] pause at the current position and with the arrow keys you can navigate up and down a little. This makes it easier for you when cutting the work. For more useful Shortcuts for Audacity to read it in another article.
- The large bar with the green arrow it shows when played in Audacity, where you are in the Track. A cut, press [P] to stop right here. Then cut with [Ctrl] + [I]. Alternatively, click on "edit > Clip boundaries" > "split Clip".
- Now, the separate Clip to rearrange, press the box on the move tool () in the tool. This is located under the menu item "effects". You can then move the Clip.

Latest Videos
Audio file in Audacity via file import or Drag&Drop-drag.
Audio file in Audacity via file import or Drag&Drop-drag.
About "effects > Amplify" to raise the volume of the track so that the loudest point is 0 Db.
 "Amplify" to raise the volume of the track to the extent that the loudest point to 0 Db." />
About "effects > Amplify" to raise the volume of the track so that the loudest point is 0 Db.
To Move the Clips, you need to select the right tool. Then you can position the Clip as desired.

To Move the Clips, you need to select the right tool. Then you can position the Clip as desired.
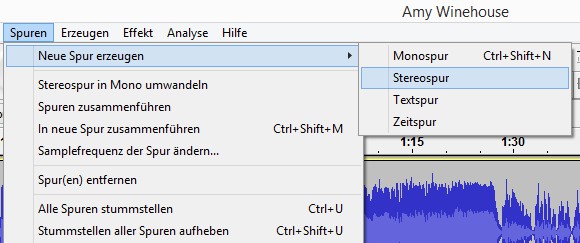
The cut Clip, you should place it in a new track also, you do this again with the move tool.
The cut Clip, you should place it in a new track also, you do this again with the move tool.
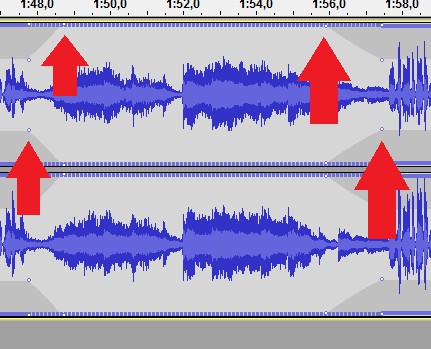
To increase the volume, select a section that is about the same volume. Then click on "effects" > "Enhance" > "OK".
 "Enhance" > "OK"." />
To increase the volume, select a section that is about the same volume. Then click on "effects" > "Enhance" > "OK".
Even more precisely, you can adjust the "Envelope tool" from the tool the volume of the box: With the mouse you put the points that you raise the volume and can reduce.
Even more precisely, you can adjust the "Envelope tool" from the tool the volume of the box: With the mouse you put the points that you raise the volume and can reduce.
Then it goes to the Fine-Tuning effects: these are often used to improve the highs and Lows, reverb add, remove noise, and to change the Tempo and pitch.

Then it goes to the Fine-Tuning effects: these are often used to improve the highs and Lows, reverb add, remove noise, and to change the Tempo and pitch.
The Audio export at the end of the file, you can highlight a certain part on one or more tracks, and with "file" > the Selected Audio in the" save export. Without marking, everything is exported and it is equivalent to the command "export Audio".
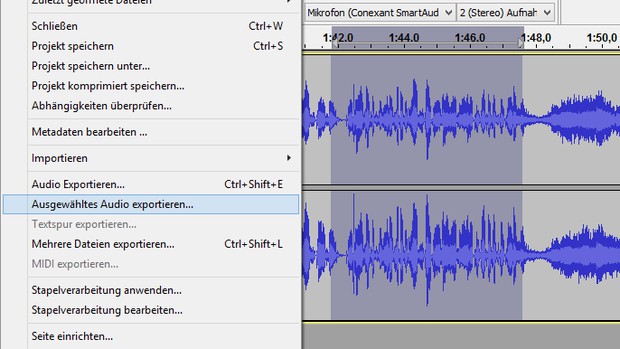 Selected Audio export" to save. Without marking, everything is exported and it is equivalent to the command "export Audio"." />
The Audio export at the end of the file, you can highlight a certain part on one or more tracks, and with "file" > the Selected Audio in the" save export. Without marking, everything is exported and it is equivalent to the command "export Audio".
When you Export, you should use for the best quality WAV, if you have also worked with WAV files. You prefer the compressed and thus more fuel-efficient MP3 Format, you should select "options" 256 kb or 320 kb.

When you Export, you should use for the best quality WAV, if you have also worked with WAV files. You prefer the compressed and thus more fuel-efficient MP3 Format, you should select "options" 256 kb or 320 kb.


