Images freely in Microsoft Word
- First insert the relevant graphics in your Word document and highlight them with a mouse click.
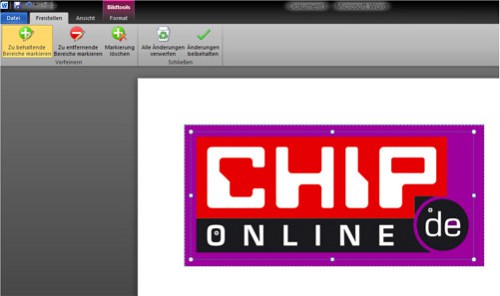
- In the top navigation bar you will find the Button "picture tools - Format". Select this.
- On the far left of the menu bar you will see the Button "Free". If you click on it, it opens the tool.
- This actually works quite simple: First, you see a narrow blue border on the image. Move it so that the is to keep the end of the image segment is completely in it.
- By the purple markings Word shows which parts of the graph are removed. If that still doesn't meet your expectations, you can make your own markings.
- You can find the appropriate tools in the menu bar displayed. Depending on whether you want image parts, or to remove, select the tool and click on the corresponding Element of the graphic. Word adjusts the marker automatically.
- If you are satisfied, click on the green check mark in the "Changes" to keep, and the picture corresponding to the mark.
Graphics with Word
The instructions refer to Microsoft Word 2010 under Windows 8. In our practice-tips to learn how you can in Word the line spacing change, the landscape setting or two tables to connect.


