Mail in Mac OS X setting up
- Start Time and click in the upper-left screen corner to "Mail" > "preferences". In the new window select the tab "Accounts". A new E-Mail-create address, click on the "+" at the bottom left.

Mail Setting Window
- Then enter your name, E-Mail address and password in the fields and go with "continue" to proceed to the next step. The program for your E-Mail address finds a matching Server, you just have to click on "Create".
- Mail does not find any suitable connection, to the Server data manually. More on this in the next paragraph.
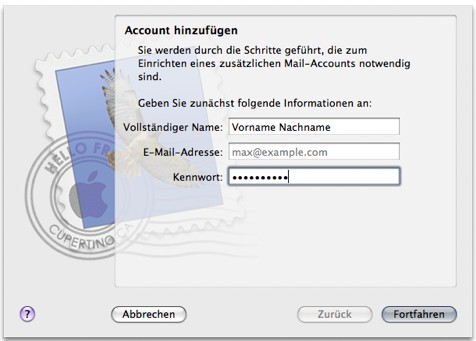
Mail account to enter data
Connection data to the E-Mail Server, independently and set up
You don't have the luck that the Mail will find the Server, you need to look on the Internet according to the settings of your Mail Provider. In our Forum you can find a list with providers such as GMX, E-Plus or the Google. Make a note of the data of your host and go through the following steps:
- First, select the type of server. The still most widely used is POP. Your Mails are retrieved from the Server and on the Mac it is stored. All changes to the messages have no impact on the Original on the Server of your Provider. You delete a Mail, it is removed only from the Computer.
- With IMAP the emails are maintained between the Server and the Mac are always in sync. That is, if you delete a message, load it on the Server in the trash. IMAP is especially useful if you retrieve your mail on multiple devices. However, not every Provider offers this service.
- Enter a mailbox description, your e-Mail address including the password and the incoming Server that you noted previously from the list. Then click "Continue".
- You activate in the next window, "SSL". In order to make sure that your E-Mails will be encrypted.
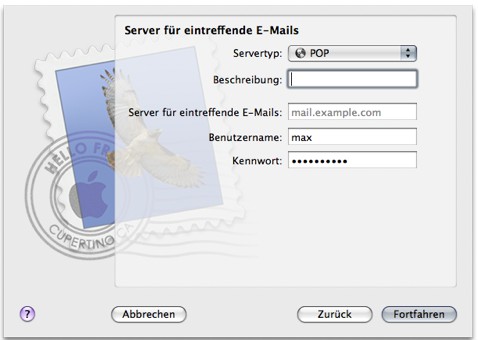
Incoming Server
- Specify the outgoing Server, and, in turn, optionally, a description. Use the hook in the case of "authentication" and enter e-Mail address and your password. After clicking on "Continue" you will see a summary of your data.
- Before you process to complete the setup, click "take Account online".

Outgoing Server
The tip applies to OS X 10.7.5 and Mail Version 5.3. In other versions, the procedure is similar.