Connect external monitor to MacBook
If you already have an external monitor, check the available connections.
- Usually you need a VGA cable , a DVI cable or a HDMI cable for the connection.
- Old MacBook models often only have a Mini DisplayPort connection, while the new Retina models are already equipped with a Thunderbolt interface. You will therefore most likely need a suitable adapter. You can find a list of all available models with the matching Macs and MacBooks in this Apple support document .
- Third-party providers usually have cheaper adapters on offer. If you are using a relatively new MacBook with a Thunderbolt connection, the following Adapter from Amazon will help you.
Set up an external monitor on the MacBook
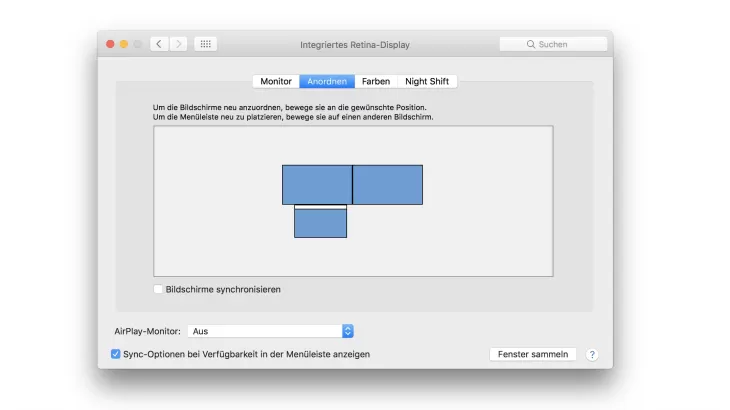
Once you have connected the monitor to the MacBook, there are various options for setting up the display and making settings. You can find this in the system settings of your MacBook under the menu item "Displays". Your Mac should automatically detect the second screen. In the "Arrange" tab you can now adjust your screen as you like.
- Arrange the screens as you wish. In this case (see image) the external monitor is to the left of the MacBook. This arrangement is important so that you can move the mouse intuitively from monitor to monitor.
- If you want to see the menu bar on the external monitor, for example because it offers a higher resolution than your MacBook, simply drag the menu bar to the desired position with the mouse.
- With the "Sync screens" option, the display on your external monitor will be an exact image of your integrated screen. The resolution of the internal display is also used for your external monitor. If you have not activated the option, you can operate both screens with different resolutions.
- If you want to close your MacBook and only use the external monitor, you have to make additional settings so that you can use the MacBook closed .