Step 1: turn on iCloud
Photos sync via photo stream between iPhone, iPad and Mac. To do this, you need to activate it on all your devices iCloud:
- How to use the photo stream in iOS is switched onin a further practical tip.
- On the Mac, first make sure that "iPhoto" installed. Then open with the key combination [CMD] + [spacebar] the Spotlight search and type in "iCloud". Click on the appropriate result.
- You put the check in the "photos" and click on "options ...". You put the check in the "My photo stream" (see image) and confirm with "Ok".
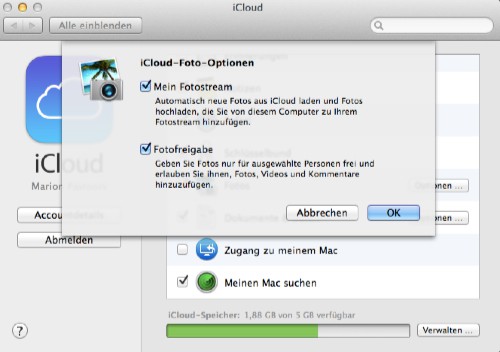
Mac: the photo stream enable
Step 2: photos from iPhone to Mac transfer
- Open "iPhoto". In the left-hand menu bar you will find under the item "shares," and the "iCloud". You click on it.
- Under "My Streams", select the entry "My photo stream" (see Screenhsot). In this folder you will find all the images that were loaded from the iPhone in the photo stream. Note: if you Have just taken a picture with the iPhone, it may take a couple of minutes, until it appears in the photo stream on the Mac.
- You want to save an image locally, or to edit, drag it via Drag & Drop into the desired Album in your library.
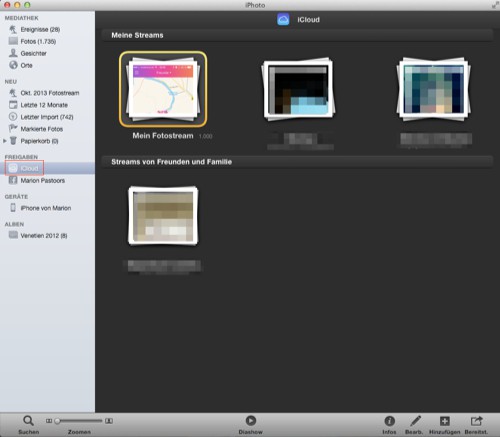
iPhoto: the images in the photo stream
Alternative: photos without iCloud from iPhone to Mac transfer
You do not want to use the "iCloud", you can transfer your photos by connecting your iPhone via USB cable to the Mac. To do this, you don't even need the program "iTunes".
- Connect your iPhone to your Mac via USB.
- Open it with [CMD] + [spacebar] the Spotlight search and type in "Digital images". Select the appropriate search result.
- Select in the left bar of the program under "devices" your iPhone. You will now see all the stored images.
- To transfer all photos or selected photos on the Mac, select in the bottom bar next to "Import" the desired destination folder.
- Then, you select the desired images and click "Import". To transfer all the recordings, select "import All".
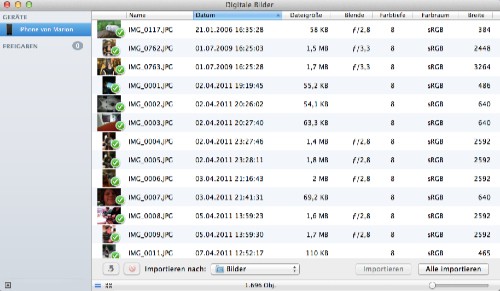
Pictures from iPhone to Mac
What you can do, if the photo stream, not all of the images loads, we'll show you in a further practical tip.


