Android 5.1 RC1 system requirements
Android was developed by Google for Smartphones, Tablets, and Smart TVs. It is based on the Linux Kernel. The Open Source project Android x86 ported to the operating system and its programs on PC, Macintosh, Virtual Box and VMWare systems. Currently, the Version of Android 5.1 RC1 Installation or virtualization.
- The current Android Version, there are both 32-Bit as well as 64-Bit System.
- For the Installation you need at least 512 MB of RAM.
- The Android Smartphone operating system needs around 350 MB of hard disk space.
- At least an Intel Dual Core processor or better is required for the Installation.
VMWare for Android prepare
Before virtualization, your VMWare must be configured. The most important steps we have them in the picture gallery combined.
- Download the 32-Bit ISO or the 64-Bit IMGfile of Android.
- Create a new virtual System by clicking on "Create a New Virtual Machine".
- In the next step, select "Custom" and "Next".
- Leave everything at default and select "Next".
- In the following Dialog, you can select "Installer disc image file (iso)" and Browse. Go to the folder with the downloaded Android ISO file and click "OK". Confirm the settings with "Next".
- You can assign a name for the virtual System and click "Next".
- Android 5.1 RC1 requires at least an Intel Dual Core processor. Therefore, you must specify in the next window, at least 2 in the case of "Number of cores per processor". The number of processors for the virtual machine you can choose.
- Then you must specify a minimum of 512 MB of memory. However, we recommend 2048 MB or more.
- The network configuration leave the default and click "Next".
- Similarly, in the next 3 steps with the "I/O controller types", "Virtual Disk Type" and "Disk".
- As the size of the hard disk, you should select a minimum of 16 GB to have enough space for Apps, programs and games. Go again on "Next".
- Complete the configuration in the summary with "Finish".

VMWare: a virtual System for Android create
Android under VMWare install
We will show you the virtualization of Android under VMWare. A summary of the most important steps you can find in the image gallery.
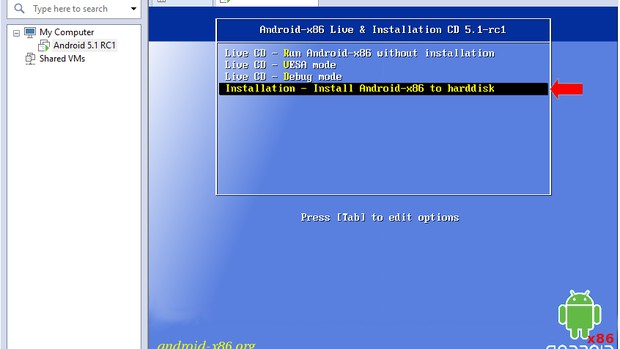
- After you have created the virtual System for Android, it will start automatically.
- Start the Installation of Android with the "Installation – Install Android-x86 to harddisk".
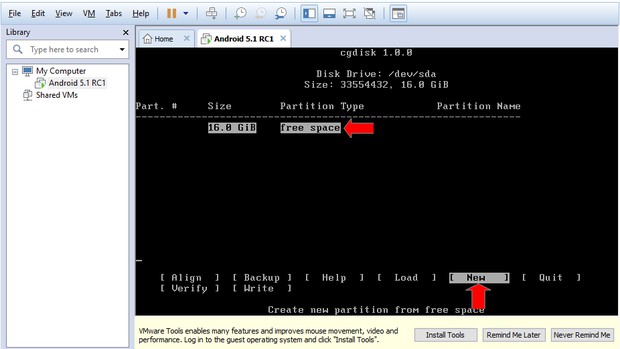
- The VMWare virtual hard drive must be designed for the Android part and formatted. To do this, select "Create/Modify partitions" and answer the following question with "Yes".
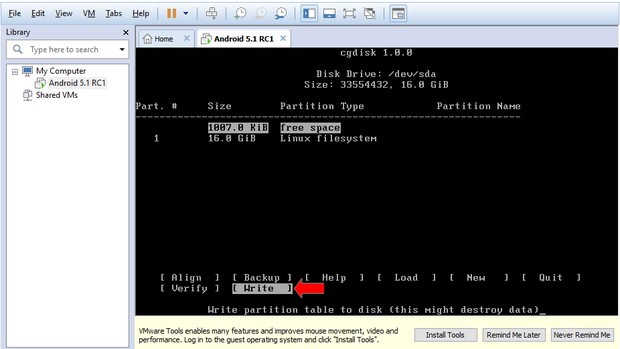
- To create a new Partition you can take "New". The number of sectors and the file system type, leave the default. You are forgiven then, if desired, a name, and write the partition with "Write" and "yes" on the hard disk. You finish the configuration with "Quit".
- In the next step, select the VMWare hard disk.
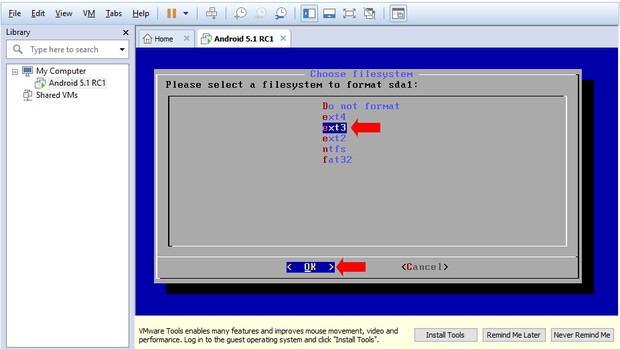
- Currently, the supported file system ext3, ext2, ntfs and fat32 of Android 5.1 RC1. We recommend ext3 as a quick and safe file system. Confirm the selection with "OK" and start the formatting of the VMWare virtual hard disk with "Yes".
- The next 4 steps for GRUB, EFI, GRUB2, Boot Partition, and System directory, you can answer with "Yes". Then the Installation of Android booting on the hard drive.
- After a successful Installation, you can launch the Android operating system with the "Run Android x86" and "OK".
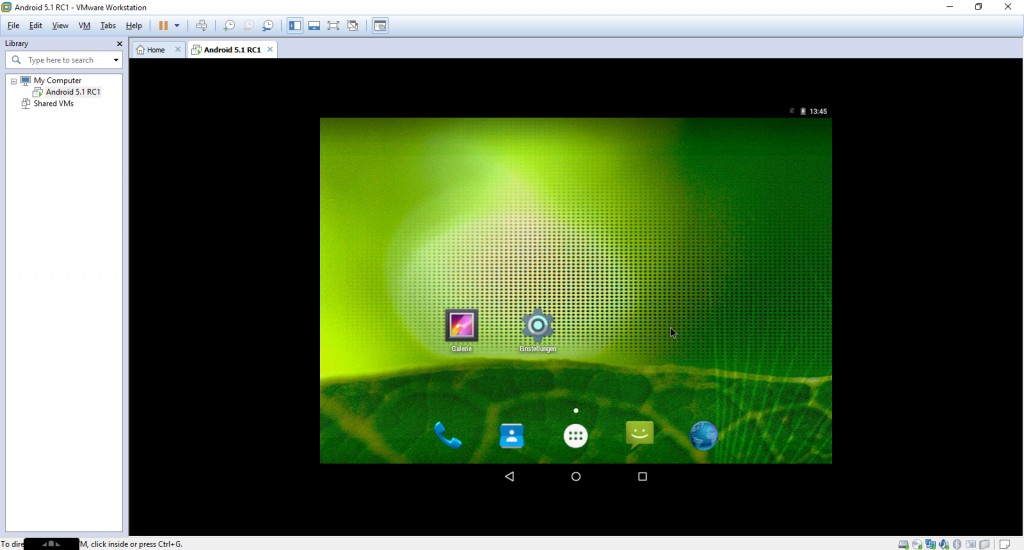
VMWare: install Android
How to use the Android System under Virtualbox install we will show you in the next tip.
Latest Videos
A new virtual System create.
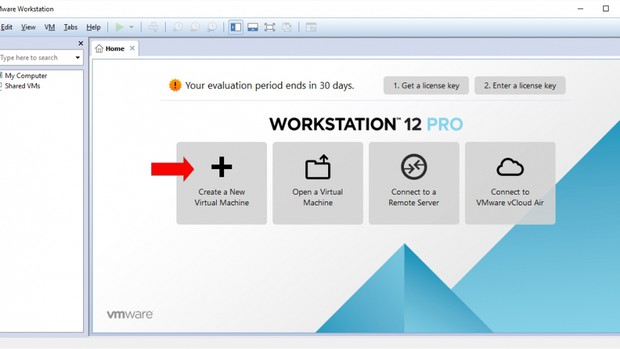
A new virtual System create.
Number of processors select. At least a Dual Core processor is provided.

Number of processors select. At least a Dual Core processor is provided.
The memory set. We recommend at least 2 GB.
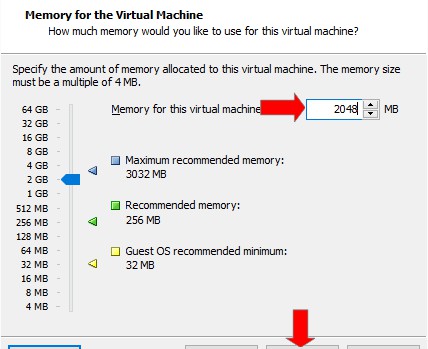
The memory set. We recommend at least 2 GB.
Disk memory set. We recommend at least 16 GB.
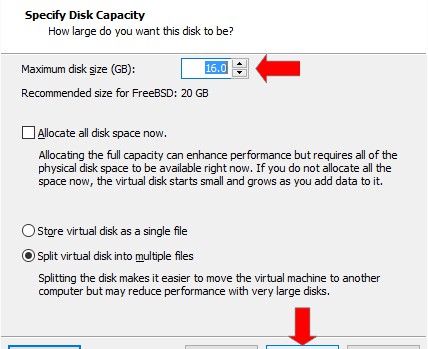
Disk memory set. We recommend at least 16 GB.
Android start the Installation.
Android start the Installation.
Hard disk partitioning.

Hard disk partitioning.
A new Partition you create.
A new Partition you create.
The new Partition on the hard drive.
The new Partition on the hard drive.
File system select.
File system select.
Android x86 launch.
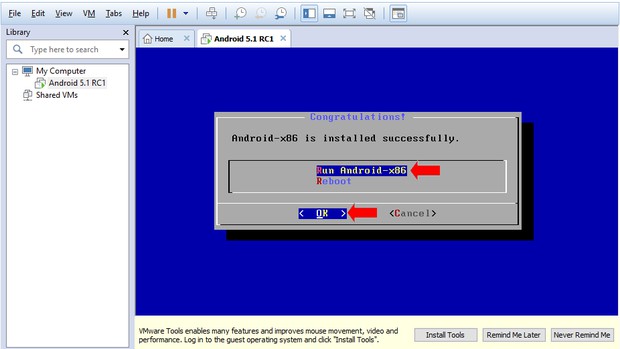
Android x86 launch.