Android under Virtualbox: preparing for the Installation
- Download the latest Version of Virtualbox and install the program on your PC.
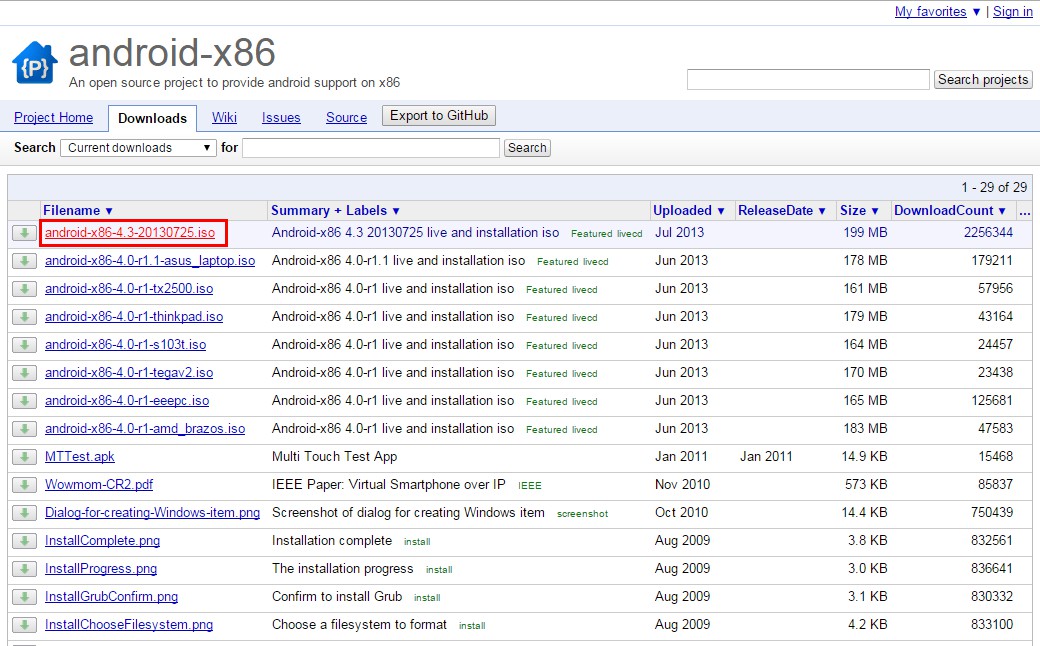
- Download the ISO-file to install Android Version. See the project android-x86 at Google different versions to Download. Here you can select the latest ISO-file.

Android under Virtualbox to run
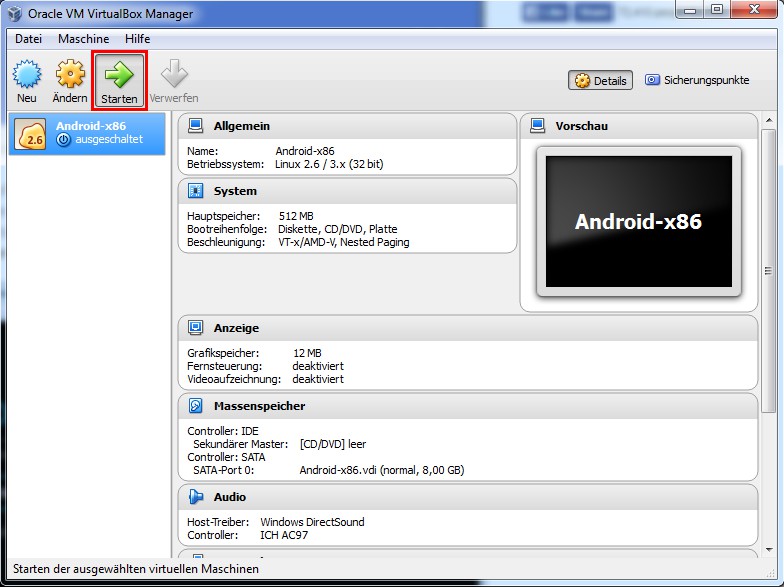
- Start the just created virtual machine. Depending on the Android ISO file you downloaded, you need to make in the next window, may still be a selection.
- When you first Start the Android Logo appears. It may take some time until it goes. Subsequently, the initial setup of your Android system opens, as you know it from Smartphones or Tablets.
- In the Virtualbox settings with the mouse, click on "machine" and then "mouse pointer Integration off".
- Now click in an area of your Android environment. You will be asked if you want to catch a mouse and keyboard. This means that you are then with your input devices in the Virtualbox. You exit the mode with the Host key by default is the right [CTRL] key. You can now simulate using the mouse, your finger input.
- During the initial setup, you will be asked for the Wi-Fi that you want to use. You can skip this step just because your Android System dials easily with your normal network connection to the Internet.
- You end Android, then by going to "machine" and "power Off via ACPI". Ensure that you turn off Android normally, when you press the power button of your Android Devices.
Latest Videos
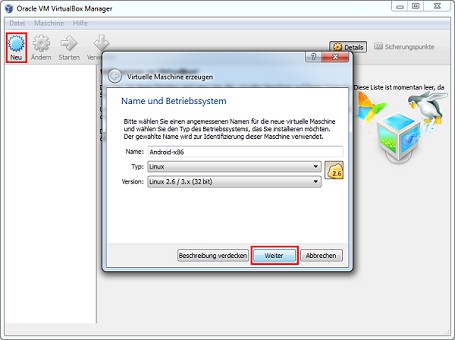
Create a new virtual machine of type "Linux". As Version select "Linux 2.6 / 3.x (32-bit)".
Create a new virtual machine of type "Linux". As Version select "Linux 2.6 / 3.x (32-bit)".
Select the location of your Android ISO file. To do this, click on the folder icon and then navigate to the file. Confirm with "Start".

Select the location of your Android ISO file. To do this, click on the folder icon and then navigate to the file. Confirm with "Start".
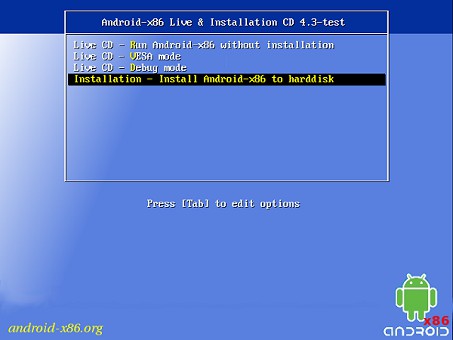
To install Android on the virtual hard disk, select the entry "Installation - Install Android-x86 to harddisk" and press Enter to confirm.
To install Android on the virtual hard disk, select the entry "Installation - Install Android-x86 to harddisk" and press Enter to confirm.
You create a new Partition with "Create/Modify partitions".
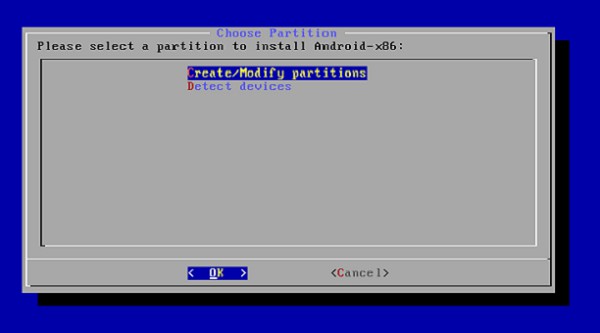
You create a new Partition with "Create/Modify partitions".
Now, select "New", "Primary", "Bootable" and "Write" in a row. Between "Primary" and "Bootable" you need to confirm again with "Enter" to complete the hard drive size of the Partition to assign.
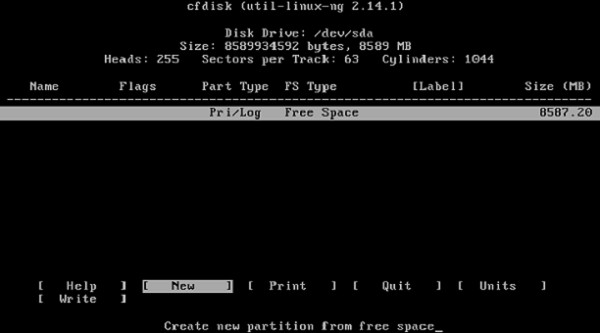
Now, select "New", "Primary", "Bootable" and "Write" in a row. Between "Primary" and "Bootable" you need to confirm again with "Enter" to complete the hard drive size of the Partition to assign.
Confirm your entries by typing "yes" and press Enter.
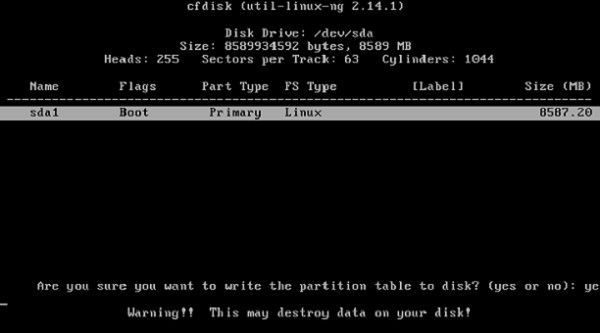
Confirm your entries by typing "yes" and press Enter.
After you have created a Partition, you can leave the menu with "Quit".
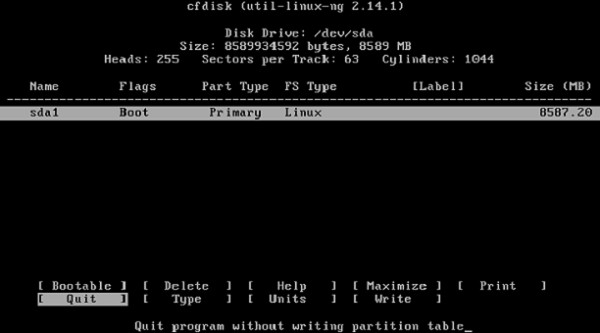
After you have created a Partition, you can leave the menu with "Quit".
Select the just created Partition. You format them in ext3 file system, and you install "GRUB".
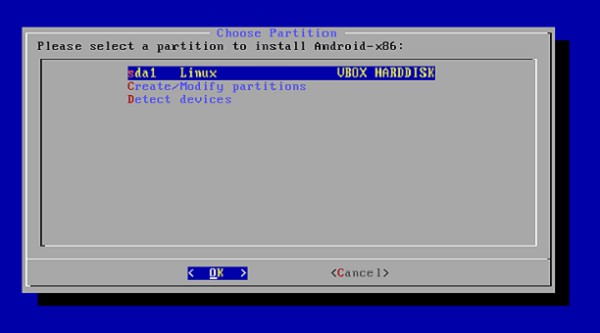
Select the just created Partition. You format them in ext3 file system, and you install "GRUB".
Set the "/system"directory as "read-write".
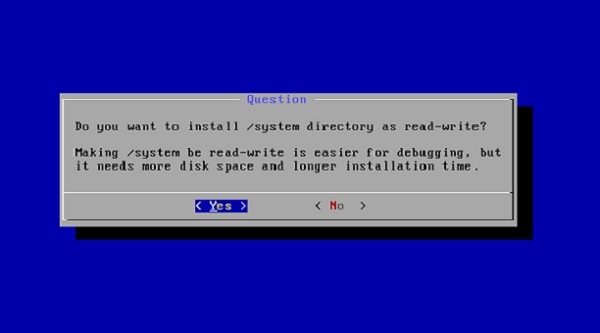
Set the "/system"directory as "read-write".
In order to simulate the mouse, Touch input, you need to disable the "mouse pointer Integration". Then click in the area of the Virtualbox, you need to confirm that the mouse input will now affect the virtual machine. You leave this mode, right [CTRL] key.

In order to simulate the mouse, Touch input, you need to disable the "mouse pointer Integration". Then click in the area of the Virtualbox, you need to confirm that the mouse input will now affect the virtual machine. You leave this mode, right [CTRL] key.


