XPS-printer in Windows to remove
With XPS, Microsoft wanted to offer the creators of PDF Paroli. In the meantime, the XPS feature is almost useless. To disable the XPS function, including the XPS printer:
- Click on the "Start" or "Windows"key and type in the search box "turn Windows features on or off". You can open the found menu item.
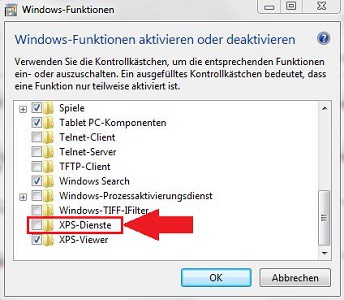
- In the Scroll menu, scroll to the bottom and remove the checkmark next to the entry "XPS services".
- Confirm with a click on "OK".
XPS printer delete
For this practical tip for Windows 7 was used.
As your default printer, change, read here.