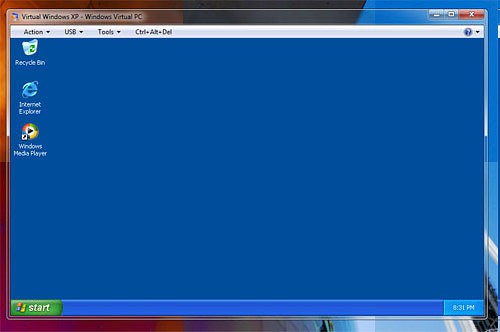
Step 1: Check the Windows 7 Version
Microsoft offers for the Windows 7 versions Professional, Ultimate, and Enterprise a free Windows-XP-mode. Thus, you can use older applications that no longer run on Windows 7, however.
- First, check which Windows 7 Version you have. To do this, press the key combination [Win] + [Pause] or click with the right mouse button on the my computer and select "properties".
- If you have the Home Basic or Home Premium Version, you need to go a little detour. Download the following instructions only "Windows Virtual PC" down.

XP mode for Windows 7
Step 2: files for the XP mode download
- First you need the program "Windows Virtual PC" to a virtual System. Here is the Download.
- Download then the XP mode download. Here you will find the Link to the Download.
- You can use Windows 7 in the 64-Bit Version, you need the XP mode directly on the following Download Microsoft download.
- After validation, two Downloads are available. "WindowsXPMode_de-de.exe" here is the full version of Windows XP including Media Player and Media Center. In the case of "WindowsXPMode_N_de-de.exe" there is no native Player.
Step 3: XP-Mode install and set up
- First install "Windows Virtual PC". This is referred to as the "Update for Windows (KB958559)".
- After a restart the application "Windows Virtual PC" available, with the virtual systems are set up.
- Then, install the Windows XP Mode and start it after the Installation.
- Follow the steps in the setup wizard to install the Virtual XP System.
- Then, the virtual Windows XP can use. To do this, open the start menu the "Windows XP Mode".
XP-Mode with Windows 7 Home Basic, and Home Premium
If you do not have the above-mentioned variants of Windows 7, you need not to renounce a virtual Windows XP. A prerequisite is that you have a legal installation CD of Windows XP or a ISO file of Windows download.
- To do this, open the start menu the "Windows Virtual PC" and click at the top of the menu bar, click "create Virtual machine".
- Follow the instructions in the wizard.
- As of memory should be sufficient, as a rule, 512 MB for Windows XP.
- After you have set up the virtual System, insert the Windows XP CD and start the virtual System, double-click on the file "XP Mode.vmcx".
- In the virtual System should now start the Installation of Windows XP, you can perform step-by-step.
Optional: integration features-install
With the integration features, among other things, programs that you install in the virtual System are displayed in the physical operating system in the start menu.
- Create a user with the same name and password as on your "real" System.
- Install, if not in the XP Version is integrated with the Service Pack 3 from Windows Update.
- Then click in Windows Virtual PC on "tools" and "integration features to install".
- Then, Windows should automatically install the Update (KB961742). If not, you will find the Link to the manual Download.
- Start Windows Virtual PC and click on "tools" and "enable integration features".
Tells you the Windows Virtual Machine to try out the free VMware Player from.


