DNS Server on Windows 10 change
The DNS-Server you can change in Windows 10 in few steps. To do this, proceed as follows:
- First, click the bottom right of the network icon in the taskbar, and then click "network and sharing center open".
- Then select on the right under "Connections" the network connection for which you want to the DNS Server change.
- Now click on "properties" from the list, select "Internet Protocol Version 4 (TCP/IPv4)" and then go to "properties".
- Under "use the Following DNS server addresses" you can add now use up to two DNS servers.
- With a final click on "OK" to be taken on the DNS Server.
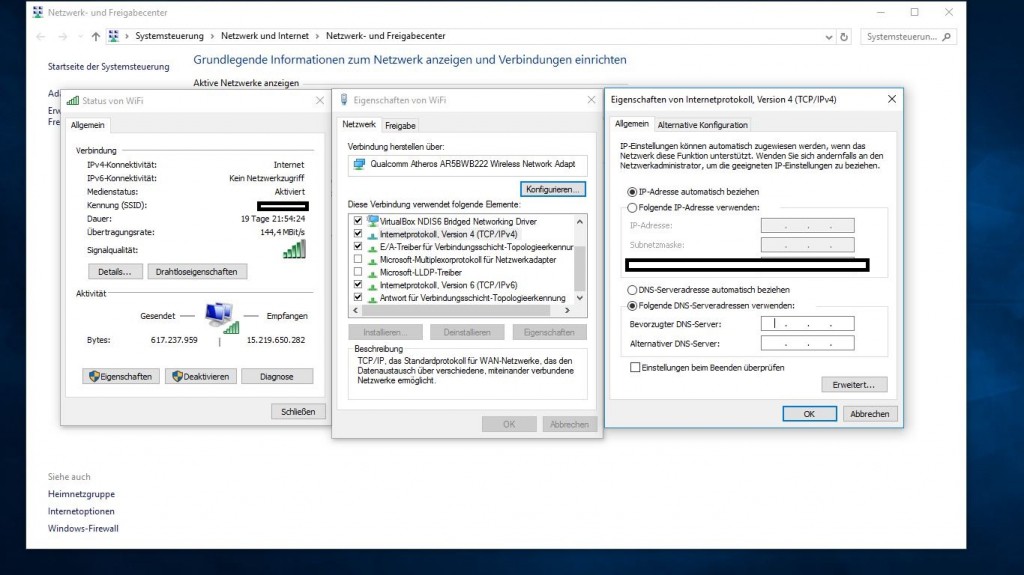
Windows 10: the DNS Server change
How to Windows 10 your Wi-Fi password reading, you will learn in our next article.


