First steps with Spybot
After SpyBot - Search & Destroy, downloaded and installed, it can already go.
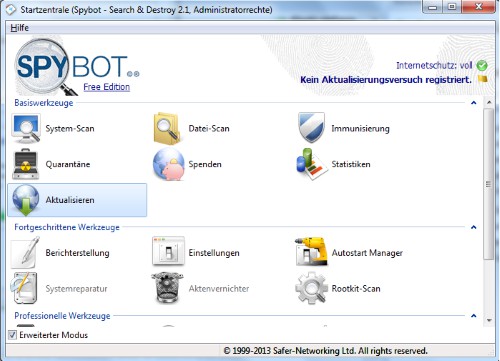
- On the start screen you will see all the basic tools. You activate the bottom right of the window, the "advanced mode", the system displays additional tools and features. This we will explain to you in more detail. Those which are slightly transparent, can not be used in the free Version.
- First of all, you should update the program, as new virus signatures are available. To do this, click in the start window, click the "Update"Button, and then click the "Update"Button. This process can take up to a Minute long. This is complete, you can close the window again.
- Before we use the program correctly, and any Spy - and Adware detection, let's take a little look in the settings. More read in the next paragraph.
Spybot Search & Destroy
Settings in Spybot to customize
To configure this, select below the "advanced mode" and select the item "settings". The most important recruitment areas, we introduce you to here:
- System services: Here you can determine whether the individual services provided by Spybot every time you Start the computer to be active. This allows you to start manually and stop.
- System integration: you can integrate certain functions into your System or remove. You want to remove the Spybot set functions from the context menu, you can do this with a simple click on the Button "Uninstall".
- Browser: at this point, you can be certain of the Browser and deselect that should not be scanned by Spybot and cleared. After a cleanup of your Browser by Spybot, among other things, Cookies, history and Cache are deleted.
- Spybot is now ready for use.

Spybot settings change
Spybot System Scan and file Scan
These two Scan types are relatively similar. First check the whole System, with the second only a certain folder or a certain file that is suspicious.
- First of all, you should consider your Computer System Scan. To do this, open the same-named tool on the home page. A new window will open.
- Click on the Button 'start Scan' is checked for your complete System, Spy - and Adware. This process can take time depending on the disk space used on your hard drive and speed up your computer, 10 to 60 minutes.
- The Scan is complete, click again on the Button that you previously set to the Start of the scan have used. This now bears the inscription "Scan results"view.
- Here you get an Overview of all detected threats. To is not only the name and place of origin given, but also the type and the level of Threat. You do not want to delete some of the findings, you can deselect this on the left side. Then click on the Button on the "Selected remedy", and remove all the files.
- So you don't have to perform every week a full Scan of your system, you have the ability to delete only your "signs of wear" to. Click start next to the "Scan" Button on the arrow and select the item "wear a scan". Thus, only your Internet activities, browsed and deleted.

Spybot System Scan
Spybot: immunization of the PC
By the immunization of the PC is to be permanently protected against Spy - and Adware. This is carried out, adjusts the Spybot settings on your Browser and your System in such a way that unwanted Software is not to get on the Computer.
- You open the tool "immunization" and click at the top right of the window, click "System check" to run a Scan to perform.
- This is complete, click on the Button "Immunize". This process can take some time.
- Should errors occur, you can make these links in the menu on the back.
Startup Manager and Rootkit Scan
- Startup Manager: This feature is really intended only for advanced users. Here you can not only edit startup entries, but also many other settings in the Registry make. Only if you really know what you are doing, you should use this feature.
- Rootkit Scan: in The Rootkit Scan you can use, however, without concerns. Press on the Button "Deep Scan", you can check your System in addition to deep-seated Rootkits.
This practice tip was carried out with the Version 2.1.21 under Windows 7. What you can do if SpyBot the error message "ws2_32.dll missing" issues, read this practical tip.


