Fonts from Google integrate
The easiest way to install additional fonts in your Website to incorporate, goes beyond Google.
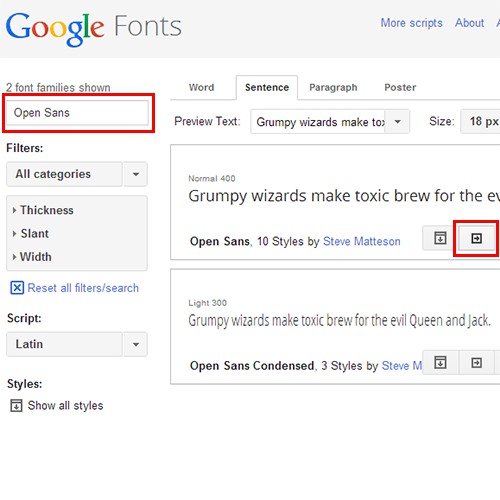
- Call Google Fonts on.
- Check the top left to the respective font. Alternatively, you can get the list to scroll and get an Overview of the available fonts.
- You have found the desired Font, click on the "Quick Use"Icon next to the entry.
- Now, select which Styles of the Font you wish to use. Recommended are "Normal 400, Normal 400 Italic" for italic fonts and "Bold 700" for fat texts. Too many Fonts, the load time of the Website may be too high. In the field below to specify which character sets you need in the normal case Latin suffices here"".
- 3) you will now see a HTML Code in the "area" of your site have to copy. This includes the fonts on your website.
- Now you can assign texts on your Website as usual, also the new Font. By default the entire Text to this font change, copy the Code below the fourth point. Add this then in an included CSS file "body { }" between the curly brackets.
Google Fonts integrate
Fonts upload to the Server
Alternatively, you can embed fonts directly on your web server.
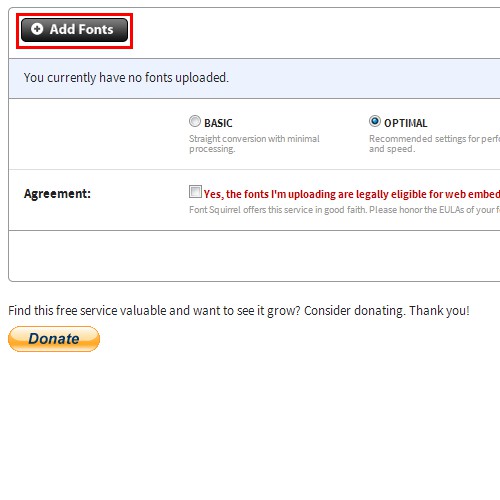
- Open the page Webfont Generator.
- Click the "Add Fonts" and select the desired Font. Check that you have the rights to use this Font. You can confirm this by setting the hook. Now the Font will be automatically uploaded.
- Then a Download that contains the Font into other file formats that can be used for web design starts.
- Open the ZIP file and load the "stylesheet.css", the eot, svg, ttf and woff files to your Server in a common directory.
- Bind the stylesheet to the uploaded file ".css" in your site. Now you can assign the new Font to the normal Text on your Homepage. You do that via the CSS property "font-family". The name of the font, you need to enter here, you will find in the file "stylesheet.css" as the value for "font-family".
Custom fonts-upload
On your site text easy to fat, we show you here.


