Preparation: The hard disk under Windows 7 to shrink
So you can partition your hard drive, you need to shrink an existing Partition:
- To do this, start the disk management. The, go to [System and security] of the control panel. Select the item [management] and then [computer management]. Now click on the entry in the [disk management]. Alternatively, you can also enter the following command in the Windows search: "hard disk partitions and partitioning".
- Click with the right mouse button on the desired drive. Select the [zoom Out] and wait until the System has prepared the hard disk.
- Enter in the new window, the size to your default partition to be shrunk. You can zoom out, but only to the extent that free memory is available. Windows calculates automatically the maximum value.
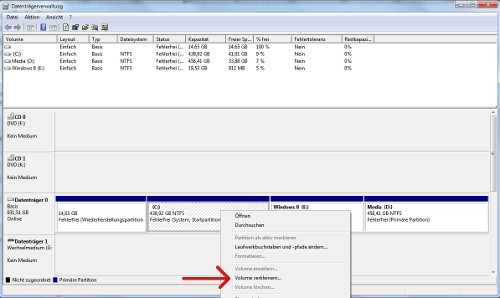
Existing Partition
New partitions with Windows 7
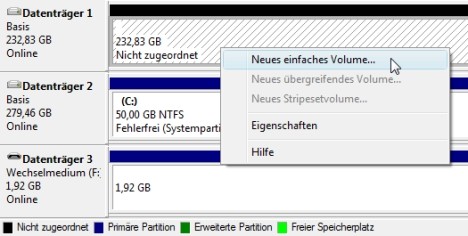
After a short processing time Windows has reduced the size of your hard drive. The truncated memory is displayed as "not allocated". From this you can now create the new Partition:
- Click with the right mouse button on the Unallocated space and select [New simple volume] (cf. Screenshot).
- There is a setup wizard opens. Here you can determine the size, the drive letter and the file system of the Partition. If you want to create multiple partitions, you should reduce the size accordingly. With a click on [finish] Windows creates the new Partition.
Creating new partitions