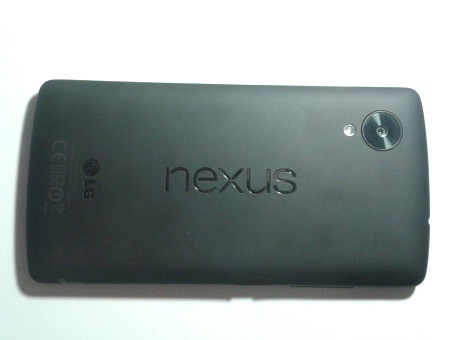
LG Nexus 5: how to replace the battery
- To open your Nexus 5, you need the right tool. Recommended, also for other repairs, for example, is this tool Set for Smartphones.
- In addition, you need the right battery. This will cost you around 10 to 15 euros and has a capacity of 2300 mAh. You can't put on a supposedly identical rechargeable batteries and a power beyond the 3000 mAh curls - these are usually of poor quality and do not fit in the housing of the Nexus 5.
- As soon as everything has arrived at your home and you are ready, you can turn off your device.
- Then, remove the cover on the back of your Nexus 5, for example, with the plastic opener or a Pick. Overall, you need to solve here 18 Clips.
- Unscrew the motherboard, the safety plate in the upper area of the device. For this you need a Phillips screwdriver, you have to remove six screws.
- The cover you can stand out easily with the Spudger, by inserting it in the slot next to the headphone input.
- It's now a matter of the speakers from the Nexus 5 to take out.
- Loosen the four screws which fix the speaker. You can then lift the speaker with the flat side of the Spudgers out.
- Now, a bit of tact is required as you need to proceed to the next step carefully.
- You are driving with the flat side of the Spudgers in the USB Connector and the connection of the battery with the circuit Board. How to use the Spudger on the Best fix should be, please refer to the pictures gallery.
- After that, it goes to it, remove the battery from the housing. Insert the Spudger under the battery and work your way in slowly, but with a bit of pressure with this. The battery is easily glued to the Smartphone, which is why more force is needed.
- Now insert the new battery and connect it to the plug. It is normal if the new battery still has some room for manoeuvre. This disappears with time.
- So then everything is working properly, plug in the USB Connector again.
- Paste the speakers in the Nexus 5 a and screw it in place with the four screws.
- Also at the top, you cover the Board with the safety plate and tighten the six screws.
- Finally, you will need to attach the back cover, by leaving it with a slight pressure to snap into place.
- Reboot your Nexus 5 and enjoy the extended life of your smartphone.
Latest Videos
Remove the lid with a plastic opener.
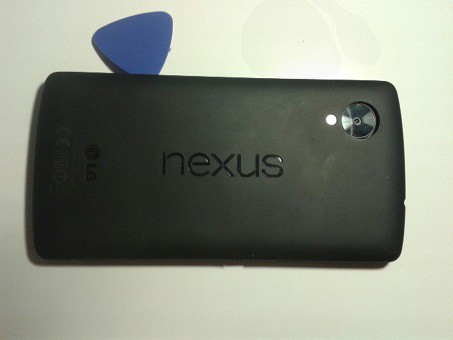
Remove the lid with a plastic opener.
Remove the screws from the Board cover, and then lift with em Spudger.
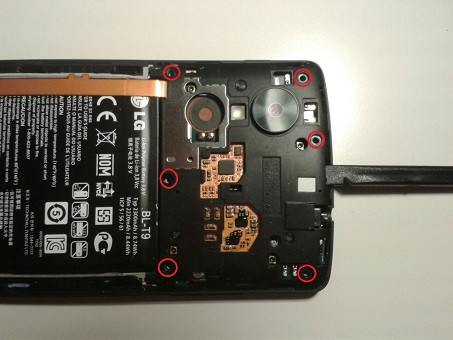
Remove the screws from the Board cover, and then lift with em Spudger.
Then loose the screws of speaker and remove these again with the Spudger.

Then loose the screws of speaker and remove these again with the Spudger.
Now, proceed cautiously. Decoration you nektieren both the connection of the battery with the circuit Board...
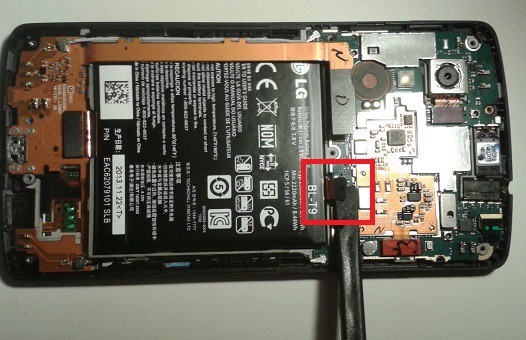
Now, proceed cautiously. Decoration you nektieren both the connection of the battery with the circuit Board...
...as well as the USB Connector with the flat end of the Spudgers.
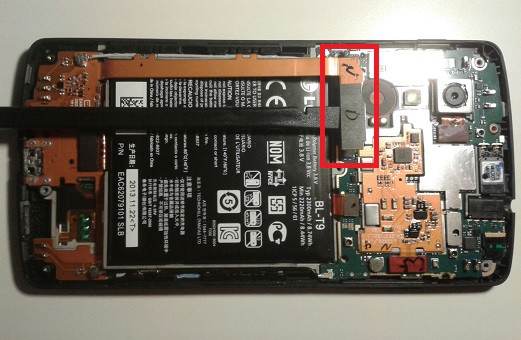
...as well as the USB Connector with the flat end of the Spudgers.
You go from the bottom of the old battery. Proceed slowly, but with light pressure, since the battery is easily bonded with the Smartphone.
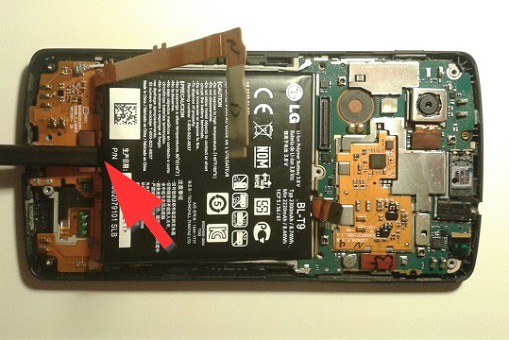
You go from the bottom of the old battery. Proceed slowly, but with light pressure, since the battery is easily bonded with the Smartphone.
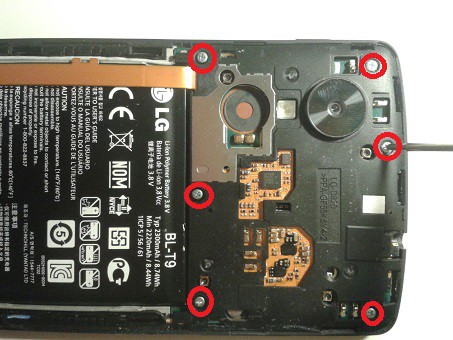
After the new battery is installed and you have plugged in the Connections, you can use the speaker with the four screws.
After the new battery is installed and you have plugged in the Connections, you can use the speaker with the four screws.
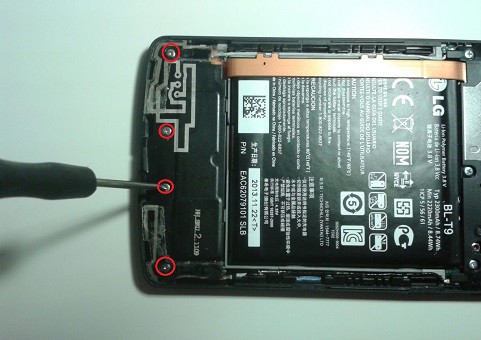
Do the Same with the main Board on the upper part of the Nexus 5.
Do the Same with the main Board on the upper part of the Nexus 5.
Now only with light pressure, the back cover of the smartphone to install.
Now only with light pressure, the back cover of the smartphone to install.


