Images on top of each other with Photoscape
Open Photoscape and choose the menu item "image processing" from. Then proceed according to the following steps.
- Click on the bottom right "menu" and select "New photo". In the following window set the size of the drawing sheet, and the color. Confirm the settings with "OK".
- In the left display, you can see your files and the folder structure. Click on the folder with your images. You should select the image that you want to use as a Background.
- The image is automatically inserted into the editing area. Click in the lower menu on the tab "object" and the "mountain and sun"Icon to another image. On the "photo" search your hard drive for the second image.
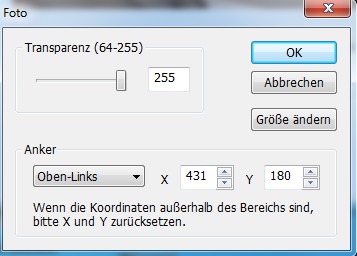
- There is a window in which the transparency of the image can specify. Here you can either change the value 255 to manually move or step the Slider to your desired transparency. Save the changes via "OK".
- In this way, you can put as many images on top of each other and create special effects.

Photoscape: images on top of each other
Read in the next practice tip with Photoscape retouching faces.


