The specifications of the clone stamp tool set
Before you can use the clone stamp, it has to be adjusted to your needs and your projects:
- Select the clone stamp from the tool bar in the left pane.
- At the top of Photoshop, you can set the specifications of the tool. There, in addition to the opacity and the layer to which objects are copied, the stamp size can be specified.
- Set the size of the stamp so that the stamp fits over the entire size of the object you want to use. You can verify this by moving the mouse pointer over the object.
Selection of the objects to be copied
Objects copy-and-paste
Once you have set up the stamp correctly, you can follow the actual copy operation:
- Move the mouse pointer over the object to copy.
- Press and hold the "Alt"key on your keyboard and click with linder ken mouse button on the object. The object is now copied. Release the "Alt"key.
- To insert the object now in a different place, click with the left mouse button on the desired Position, in which the new object should appear.
- You can insert the object as often as you like, without having to copy it every time.
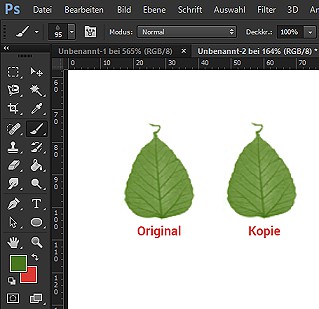
1:1 copied object in Photoshop
In the Photoshop Tutorial for beginners will cover the basics of graphics editing software is simple explains.


